How Do You Get Big Bucks On A Trail Camera?
The process of setting up a strategy for attracting huge bucks can be quite a challenge. Thankfully, the world has evolved to a point where the technology we have in ‘motion and infrared-activated trail cameras are uniquely wonderful. How then can you get big bucks on a trail camera?
Place your camera strategically and properly in funnel areas, good scrapes, and near their food sources and you can get big bucks. However, the typical hunting process requires tons and tons of patience coupled with creativity.
Irrespective of the hassles involved, trail cameras will put you in a better position to snap or video big bucks. In the rest of this article, we will provide you with interesting and valuable information on how you can get big bucks on your trail camera. So, sit tight!
Where do you put trail cameras for big bucks?
Improper use of the trail camera can result in certain unpleasant developments like; losing your catch. The wrong use of these devices will jeopardize all your efforts and will waste money invested on them, but on the other hand, proper usage of trail cameras will make your hunting dreams come true, no doubt about that.
Thanks to trail cameras, many hunters have now become as interested in getting photos of that buck as they are in bringing it down. Nonetheless, in your quest to get amazing photos, make sure you don’t spoil your hunting. Why shouldn’t you? Well, I’d say that’s because the whole point of setting out would be misplaced, plus it’s not exactly a nice experience and no one loves learning the hard way, so you might want to take this one to heart.
The placement of your trail camera determines whether you’ll have a big or medium sized kill or no kill at all, it’s all about guts, insight and creativity. These are the best time-proven ways that you can deploy:
Place the camera in funnel areas
Positioning trail cameras on funnels just between the buck’s food sources and a bedding cover will help you know if it is in search of does, traveling or just passing by. Planting the trail camera in places like this is also advantageous for getting quality photos in the daytime while letting you set up some kind of game plan to hunt down the deer.
Find good scrapes to place the camera on
Deer change areas at different times of the year, simply check the moon and you’ll get the necessary clues that you’ll need. Give the camera some break for a good number of days and come back to check them. If there’s a full moon with the appropriate temperature, do not check in the middle of the day, it is not the best idea. Owing to the unpredictable movement of the deer, if cameras are not placed on good scrapes, you won’t know if one passed by or the direction it went.
Place cameras sparingly
You are probably conversant with the popular saying, ‘the patient dog eats the fattest bone’. While hunting for deer, you’ll need lots of patience as it takes quite a lot of time to attract huge bucks. Make use of trail cameras prudently because you run the risk of having them stolen especially when they are set up in public places.
If possible, mount your camera 8 feet above ground level; this will keep it protected from being easily detected and being stolen.
Put cameras in places where there are food sources
A lot of the time, the slightest pressure can set a bad tone for deer; this is due to the fact that some seasons are tough for hunting because of cold weather conditions. Cold weather and extremely low temperatures like that of the winter season make deer to bed very close to where they have access to enough food.
Placing the cameras in areas where there is a food source will ease the atmosphere for bucks by taking off the pressure of hunger. As a matter of fact, it is in seasons like this that hunters have the best kills and the nicest photos are taken without messing things up. In the event that you are not able to use food or mineral bait due to certain legal restrictions, you can hang cameras around river crossings or flood water channels.
How do you get big bucks to come in?
Many interests have been diverted from just gunning down bucks to capturing close and personal views of them. Howbeit, seeing them gathered in one position for a nice shot might just seem like the toughest task. Thankfully, it is not entirely impossible to pin down those bucks. There are quite a number of proven tricks to get those bucks to come in and this guide is about to show you. Having stated that, I’ll advise you to continue reading.
Set up cameras near food sources
Deer flock around places they can get easy access to food. Use the trail camera to survey the areas of your property where they are prone to visit, once in a while, not too often, just so you don’t get carried away and subconsciously chase the bucks away. Make sure the camera is not mounted in areas where the deer feel unsafe or else when there’s a hiccup and the deer change location, you’ll start your journey all over again from the scratch, and that’s a whole lot of stress.
Try to position your cameras only in food sources where trails lead to from day time movement areas. This makes it easy to track the bucks movement. In a situation whereby you are only able to get nighttime photos, you’ll undoubtedly gain some knowledge about the herd which will help you plan a better strategy that will work.
Keep scents in check
To get bucks to come in, you must know how to keep your scent undetected. It is very important to wear scent-free clothes and boots when checking game cameras. It’s always fun to see bucks on your trail cameras; however, frequent checking could chase them out of the site.
If the law allows it, make use of an attractant:
You can use food and mineral as bait to attract bucks because it increases your chances of getting images and taking down the buck if you want to go further. Food like corn makes a deer stop over in front of the trail camera.
Channel movement to the trail camera
This one might seem challenging but it’s a pretty specific procedure. This strategy requires a good amount of effort in most cases but it’s worth the time and energy. You channel movement to the camera by compelling the deer to enter feeding locations at one point in time. It is a non-baited approach and does not require your presence at all, so you are literally compelling without force.
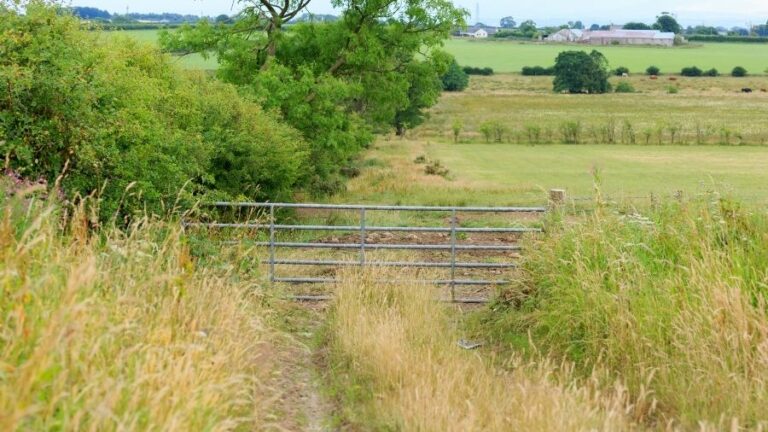
The process requires you to create some blockades with some heavy equipment or erect fencing. This will make the bucks to enter the natural openings or food field at one or more specific points depending on the opening you provide. This is one of the best ways to get good pictures with amazing viewing angles. Fruit trees and smaller food plots like oak trees or attraction fields could serve as easy blockading agents especially when natural barriers are available.
While using this strategy, you should take into consideration how you are going to access your camera with convenience. Placing cameras between two different habitat types will make accessing it easy. This is because; you stay out of sight which will reduce the pressure in the area. If it’s not possible to hide the camera because of the field placement or landscape, you can place the remote camera on a mounting device and aim it downwards.
Study the communal behavioral pattern of deer:
Bucks also take advantage of objects found within their habitat or grazing area to rub their foreheads. They could also chew on these objects for additional salivary scent while using their preorbital glands. They communicate with each other through scent glands and vocalizations. By placing plant cedar posts, making use of a sapling holder and hanging frayed ropes, you provide an avenue for year-round communication between these animals. This is the primary focus and not necessarily to create scrape sites in the fall.
When you place any of these objects at the pinch point, you have succeeded in creating a go-to feeding area for bucks. With this strategy, taking great photos or discreetly gunning down wouldn’t be a hard task. You can get every deer’s picture when it checks out the item before it feeds on it.
Place the remote camera discreetly
In other words, you need to hide the camera in a very discreet location. Sometimes, the deer won’t mind seeing the camera; their utmost concern is the bait that’s in front of it. Nevertheless, if you remove the bait in the front of the camera and the deer is left to fight against a foreign object, you need to make sure your camera is well hidden just so you don’t lose it.
In some cases, bucks could get used to the cameras very easily and some others won’t be able to, it’s basic that everyone is not the same and this applies to animals too. If you place the camera on a camera-stick or fence post in the middle of the field or plot, some deer that come by occasionally could get used to it.
Apart from resident deer, we have traveling deer that rarely pass by your hunting site. Bucks like these could sight the trail camera from some meters away and can completely avoid the plot where it is placed. So, being able to get pictures or record videos of traveling bucks is extremely hard except you are able to skillfully hide your camera.
Be strategic and proactive
It is very important that you do this because there are bucks that go completely invisible when they are under hunting pressure. They drastically reduce their movements in the daytime, but they are still around, just that you don’t see them. The challenge here is finding out where they are hiding.
A lot of whitetail experts have revealed that there are deer that are hugely nocturnal; they are rarely glimpsed in the daytime. Bucks like these live mostly in areas with ample forage so there’s food every morning and evening without a struggle. So, whenever they come to their feeding sites, there’s always enough food for consumption.
To get a shot at these bucks, situate your trail camera in places where you find huge tracks or scrapes of deer. In the event that you don’t see any deer after many days of survey, this means that they probably would have felt some pressure from you and other hunters within the area and minimized their movement to the barest minimum. Interestingly, mature bucks can be quite intelligent as they seem to have the ability to detect the pattern of a hunter’s movement better than we pattern their own, so you’ll need to step up your hiding game.
Do trail cameras scare big bucks?
Like regular people, bucks have different behaviors, different personalities, different memories and a lot of other vast qualities. Each deer reacts differently to trail cameras. For some, it is rather unsettling and will creep them out, while for others it means nothing at all because they are just after the delicious food in front of them. Mature bucks tend to stay away from remote cameras as much as they can because they are usually more cautious than the younger ones. The bottom line is that each deer will react differently when they know full well that a trail camera is present.
However, thankfully, manufacturers of trail cameras understand the importance of adequate concealment features and discrete operation of these cameras and many have taken their game a step up. Modern trail cameras come with designs that can easily blend in with the surrounding grounds. Trail cameras particularly suited for game watching or hunting usually come in wood-like finish or camouflage. These designs have proven to scare mature bucks the least.
Another innovation is the use of infra-red LED flashes in modern trail cameras instead of the traditional white flashes. Though IR LED flashes can be visible to bucks, they reduce the chances of outrightly scaring them especially when the camera has No Glow IR flash.
How do you get mature bucks on a trail camera?
Mature bucks are a very cautious set of animals so it isn’t that hard for them to detect the presence of an unfamiliar object. Taking regular surveys on the sites and plots will help you get conversant with the areas the bucks pass and how frequently they come by. This will give you some idea of how to set up your remote camera away from the buck’s sight. The camera shouldn’t be the first object they should see when they enter the plot. Here are sure ways to get mature bucks on your trail camera:
Do some scouting
Take inventory, do some quiet scouting without disturbing the woods. Have a game camera for every 60 to 100 acres if possible. This means you’ll need to set up as many cameras as possible in early-season feeding areas. A deer or more will eventually show up on a camera sooner or later.
Set up your trail camera with good placement
When setting up your cameras, you need to take note of some important facts. Do some tests by moving in front of the remote camera. Walk to and fro at different angles and ranges so you will know the kind of images you’ll get from the camera. Do some aiming practice with the camera, target above and below your belt buckle to improvise the movement of the deer.
Here are some things to take note of when setting up your camera
– Clear out the bush around the camera in order to prevent false motion-sensor triggers.
– Avoid placing the game camera in areas that experience fog. This will make it extremely hard to see mature bucks and getting a good photo or kill will be nearly impossible.
– Make sure you don’t set up the camera on stand sites; this will make it so visible to bucks and will keep them away.
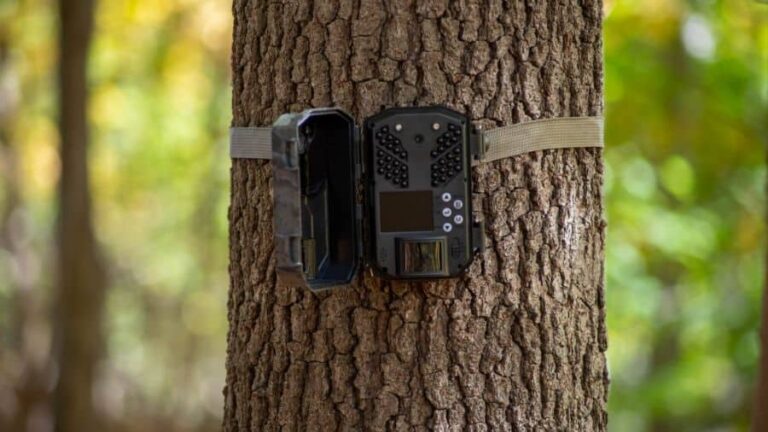
– Place the trail camera on a stout tree to prevent any probable movements or breakage especially in the event of winds.
– To avoid sun glare, set up the camera to face north and prevent sharp glares or reflections which will alert the bucks.
– It is very important to set the remote camera some feet away from the target area. About 10 to 16 feet will do the work.
– Set up with a dark background, it ensures better photo and video quality.
– Make sure to check the operation and target acquisition of the trail camera. This would go a long way in helping you locate mature bucks a lot faster.
Check out a collection of best trail cameras for capturing mature bucks on Amazon