How to Easily Pitch a Tent On Your Own for Solo Camping Adventures
Heading out on a solo camping trip but feeling overwhelmed trying to pitch your tent alone? Don’t worry, you got this! Setting up a tent single-handedly is very doable if you follow some simple techniques to make the process easier. With the right approach, you can get your home base erected in no time.
The idea of assembling poles, staking down corners and getting everything properly aligned can seem daunting without an extra pair of hands. But using a few tips to simplify each step, the job becomes much more manageable. Taking it slow and steady is key – don’t rush! Before you know it, your tent will be pitched and you’ll be relaxing in your own private campsite oasis.
First, start by picking out a nice flat patch of ground and laying everything out neatly. Save your energy by pushing in the corner stakes before you stand up the tent. Then focus on getting one pole in at a time, attaching it securely before moving to the next. And don’t be afraid to get creative in how you position yourself! The following paragraphs will walk through the full process with techniques tailored specifically for flying solo. Soon you’ll see that with a thoughtful strategy, you can pitch a tent alone just as well as with a partner. Let’s get you ready to camp in style on your own!
Select the Perfect Spot for Your Solo Site
Choosing an ideal location is your first task. Keep in mind factors like:
- Space – Make sure there’s adequate square footage for your tent, guy lines, vestibule and your own movement.
- Surface – Look for smooth, flat, level ground with no bumps or rocks that could cause discomfort.
- Drainage – Pick a spot that won’t turn into a pool if it rains. Avoid dips or depressions.
- Exposure – Position the doorway out of the prevailing winds but not too secluded either for safety.
Take a walk around the area to consider all elements before deciding. This will make the rest of the set-up process smoother.
Unpack and Organize all Your Gear
Before erecting anything, take out all the contents of your tent bag and poles and lay them out in an orderly fashion. This lets you take stock of everything needed and understand how the components fit together. Having a clear workspace also prevents losing or forgetting pieces.
Your gear will likely include:
- Tent body
- Rainfly
- Poles and stake bags
- Ground tarp/footprint
- Mallet or hammer
Assembling the poles first before standing up the tent itself will make the job much easier.
Stake Down the Corners of the Tent Body
Here’s a pro tip when flying solo: stake down the 4 corners of the empty tent before inserting the poles. This prevents the wind from catching the tent and lets you work at ground-level without holding up the tent fabric.
Lay the tent body flat where you want it, orient the door, then use the mallet to drive the stakes into the ground at an angle on each corner. Leave 2-3 feet of slack.
Build the Tent Frame Starting with One Pole
The key when alone is tackling one pole at a time. Most backpacking tents have two. Follow the instructions to connect together the shockcorded sections and form the first pole.
Keeping the tent anchored by the corners, feed one end of the pole through the sleeve or clip until it slides into the grommet at the opposite corner. Attach the pole by inserting the pin into the grommet.
Attach the Remaining Tent Poles
Moving slowly around the tent, extend the next segment of pole and work it through the sleeve/channels, fastening each end into the corresponding grommet.
Take care not to stress the fabric. Having the corner anchors in place lets you easily pull the poles into position before staking up the body.
Lift and Stake the Tent Body
Once both poles are threaded through and pinned at both ends, the structure will be ready to lift. Move to each corner, pull out the slack and re-stake at a sharper angle while raising that area up.
Check frequently that the tent is centered as you work your way around. Adjust as needed. Doing this gradually avoids fighting the whole tent at once.
Fasten the Rainfly
With the tent standing, you can now drape and attach the rainfly, which provides water protection. Pull the straps over the pole ends and connect using the clips, loops, grommets or hooks as directed. Stake out vestibules away from tent body.
Secure All Guy Lines
Guy lines reinforce the stability of your tent, keeping it taut from all directions. Walk a full lap around the tent, pulling any slack out of the guy lines before staking them down securely. Adjust their angles as needed.
Do a Final Check for Tautness
Zip yourself inside and do some push-ups against the walls and ceiling to check for sagging or loose spots. Tighten the exterior guidelines further if needed. Your anchored poles and corners should keep the tent walls taut.
Now crack open a cold one – you’ve earned it after successfully pitching solo! Enjoy having your own cozy tent sanctuary ready for relaxing after a day of adventures.
Gear to Make Tent Set-Up Easier When Solo
Equipping yourself with the right tools will make tackling tent setup alone much more manageable:
Mallet – Drive heavy-duty stakes into the ground with force using a rubber mallet.
Multi-tool – Seriously handy for making adjustments like tightening poles or clipping hooks.
Headlamp – Allows you to see after dark while keeping both hands free.
Knife – Comes in handy for cutting rope, slicing through knots or cutting tape.
Work gloves – Save your hands from blisters when pulling on straps and ropes.
Having the right equipment for leverage and visibility makes all the difference for a smooth solo setup.
Choosing a Tent for Ease of One-Person Setup
If purchasing a new solo tent, keep these factors in mind:
- Choose a freestanding tent that doesn’t require staking out the body first.
- Look for color coded pole and sleeve connections for intuitive assembly.
- Favor tents with clips over sleeves for easier pole insertion when alone.
- Seek out thoughtful pole configurations to create optimal headroom and space.
- Ensure good ventilation and coverage with full rainfly and vestibule areas.
Investing in a quality tent designed for simplicity will allow you many seasons of independent adventuring.
Tips for Finding a Perfect Campsite
Part of tent camping alone means picking out the ideal place to pitch your shelter and bed down for the night. Keep these elements in mind when surveying a potential campsite:
- Seek flat, even ground with no major bumps, divots or slopes.
- Check for signs of pooling water or runoff if it rains.
- Avoid pitching directly under dead trees or hanging branches.
- Look for natural windbreaks from hillsides or boulders.
- Pick a site with both sunlight and shade options as desired.
- Consider proximity to bathroom facilities if car camping.
- Avoid thick underbrush that may conceal uneven ground or critters.
Taking time to assess the camp area will allow you to pick the optimal spot for comfort, views and convenience.
Must-Have Features in a Solo Tent
When evaluating tents for solo camping, look for these useful features to enhance the experience:
- Vestibules – Covered porches provide sheltered storage and living space.
- Gear lofts – Handy mesh pockets to organize smaller items.
- Gear ties – Useful points to hang lamps, clothes or additional storage.
- Hooded vents – Allow airflow while keeping out rain.
- Media pockets – Hold smartphones or small electronics.
- Reflective guylines – Aid visibility at night for safety.
- Divider panels – Let you partition space or block wind/dust in a pinch.
Purposeful design elements make spending time in your portable refuge more enjoyable.
Useful Upgrades for Solo Tent Camping
Enhance your lone adventuring by picking up these bonuses:
Sleeping pad – Provides a soft, insulated layer under your bag. Inflatable pads pack small.
Pillow – Treat yourself to a cozy, packable camping pillow for optimal comfort.
Headlamp – Allows hands-free light at your campsite after sunset.
Camp chair – Relax in comfort around the fire or under the stars. Seek lightweight, packable models.
Solar lantern – Hang inside your shelter for radiant, eco-friendly illumination all night.
Portable power pack – Recharge devices anywhere with a backup power source.
Making your solo tent an oasis of comfort will have you excited to hit the trail.
Keeping Safe When Tent Camping Alone
Embrace solitude but take smart precautions:
- Research the area and know potential risks like wildlife or difficult terrain.
- Tell someone your exact plans and check-in schedule.
- Set up where other campers can see you if possible. Avoid total seclusion.
- Lock up food securely to prevent unwanted animal visitors.
- Keep a flashlight, whistle and pepper spray handy just in case.
- Avoid hiking or exploring alone at night; have a plan if you get turned around.
- Check weather forecast for storms or temperature drops that demand extra preparation.
Being self-reliant in the wilderness is rewarding but do plan ahead to minimize hazards.
Packing Tips for Solo Tent Camping
Travel light and smart by sticking to these basics:
- Focus your gear list on essentials only to reduce weight.
- Repackage items into reusable zip bags to consolidate space.
- Use a waterproof compression sack for your sleeping bag to shrink size.
- Fill excess boot space with soft items like socks or clothes.
- Attach sleeping pad and tent to the outside of your pack if possible.
- Carry 2-3L of water and nutrient-dense trail snacks to fuel your body.
- Choose versatile layers that allow adapting to changing temps.
- Always bring essentials like first aid kit, fire starter, knife, maps.
Editing down to the bare camping essentials keeps your pack weight manageable over long distances.
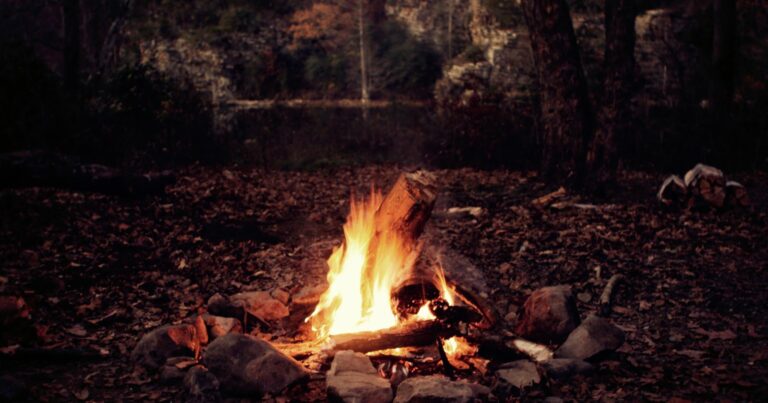
Dealing with Rain While Camping Solo
Don’t let bad weather deter your independent adventures. Come prepared to handle wet conditions:
- Choose a tent with a rain fly and sealed seams for protection.
- Pack a tarp to create a sheltered cooking/hangout area.
- Waterproof your sleeping bag and pack contents with reusable liners.
- Bring quick-dry travel towels and extra socks.
- Store a spare set of dry clothes in a bag in your vestibule.
- Look for covered picnic areas to escape sustained downpours if needed.
- Know when thunderstorms or flash flooding demand truly seeking sturdy shelter.
- Embrace the tranquility of listening to rain patter on your tent – relaxing!
With the right gear, you can comfortably wait out showers until the clouds part and reveal rainbows.
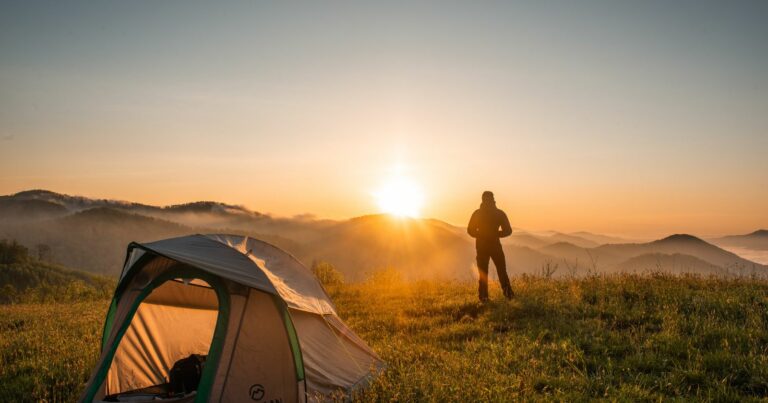
Enjoying Sunset and Sunrise While Camping Solo
Take time to appreciate the beauty of fleeting hours when on your own:
- Watch the sunset paint brilliant hues across the landscape.
- Listen for the many sounds of nature intensifying at dusk – birds, bugs, breeze through leaves.
- Let your eyes adjust to the fading light and enjoy stargazing from your tent doorway.
- Zip your tent closed and let the still darkness lull you to sleep.
- Wake early to birdsong and first light. Brew coffee while the world wakes up.
- Venture outside your tent just before sunrise to watch the sky come alive.
The gift of experiencing nightfall and daybreak immersed in nature is magical.
Making Tent Camping Alone Feel Less Lonely
Missing companionship? There are healthy ways to fill the void:
- Immerse yourself in the sounds, smells and sights of nature around you.
- Call or text family and friends at set check-in times.
- Meet fellow campers and say hello to the property hosts.
- Sing aloud to your favorite songs. Laughter and deep breaths also help lift your spirit.
- Journal your thoughts next to a cozy fire or by the light of your lantern.
- Download audiobooks, meditation tracks or podcasts to listen to in your downtime.
- Remind yourself that the refreshing solitude of solo camping is a temporary choice you made.
Appreciate your independence while taking steps to boost your mood until it’s time to return home.
Packing Checklist for Solo Tent Camping
Use this checklist to pack wisely for your next solo escape:
- Tent, poles, stakes
- Sleeping bag, pillow
- Sleeping pad, air pump
- Headlamp, flashlight
- Lighter, fire starter
- Pocket knife
- Water filter or treatment
- Water bottles, reservoir
- Camp chair
- Toilet paper
- Baby wipes
- Food, snacks
- Plates, cutlery
- Camp stove, fuel
- Pots, pan
- Coffee, tea, drinks
- Outfits, socks
- Hiking shoes
- Sandals
- Jacket, layers
- Rain gear
- Swimsuit, towel
- Toiletries
- Medications
- First aid kit
- Multi-tool
- Watch, compass
- Bear spray
- Map, guidebook
- Cash, credit card
- Identification
- Permits, passes
- Sunscreen, hat
- Insect repellent
- Chargers, batteries
- Trash bags
- Notebook, pen
- Cards, book
Customize your list based on location, weather, duration and personal needs. But having the essentials covered means you can head out prepared and confident for an amazing solo adventure!
Frequently Asked Questions
What size and type of mallet is best for staking down a tent alone?
Look for a 16-20 oz rubber mallet that gives you enough striking force without being overly heavy or awkward. The rubber head won’t damage tent stakes.
Should I set up my tent at home first to practice?
Absolutely! Practice pitching your tent in the backyard to get familiar with how all the components fit together. This makes the process much easier when actually camping.
What knot should I use when tying guy lines?
The trucker’s hitch is ideal for securing tent guy lines. It lets you easily tighten and adjust tension as needed. Practice tying it beforehand.
Can I use rocks instead of tent stakes if the ground is too hard?
Yes, collecting some smooth, flat rocks along with your other set-up supplies can be a handy backup plan if the soil is too compacted for stakes.
How can I find a campsite after dark?
If arriving late, use a flashlight or headlamp to inspect potential sites before pitching your tent. Identify hazards like roots, rocks or uneven surfaces.
Enjoy Your Independence Out in Nature
Pitching a tent on your own allows you to venture wherever your wandering spirit takes you. With some thoughtful planning and leveraging techniques, you can easily erect your temporary shelter in beautiful solitude. Follow these tips to embrace the refreshing freedom of camping and exploring independently at your own pace.