How to Prepare Your Tent for a Comfortable Camping Trip
Nothing beats falling asleep to the sounds of nature while tucked away in your trusty tent. But without proper prep, your camping trip can go downhill fast thanks to a leaky, dirty tent. Avoid a soggy, bug-infested mess by taking the time to get your tent camping-ready before heading to your campsite.
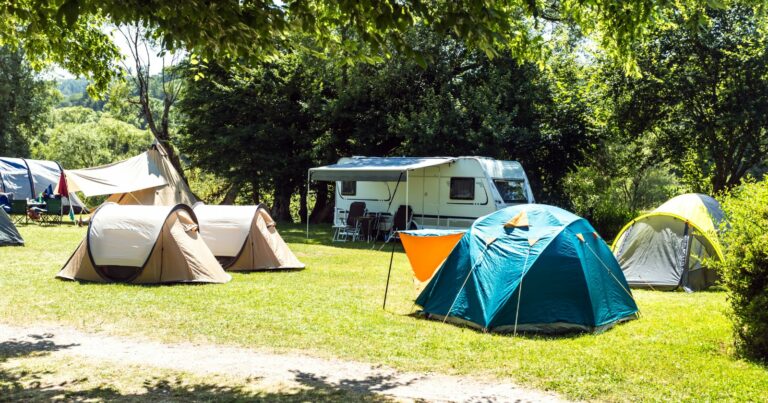
Setting up a cozy home-away-from-home tent starts before you ever leave the driveway. Following key tips for preparing your temporary shelter will ensure sweet dreams instead of restless nights.
In this article, we’ll explore the steps to prep your tent so it’s primed for an awesome camping adventure. We’ll look at choosing the right campsite location, sweeping your platform clear of debris, utilizing a protective tarp, and allowing a wet tent to completely dry out.
With this advice, you can spend your nights gazing at stars instead of being kept awake by lumpy rocks jabbing into your back. Or worse – discovering the hard way that mold had been quietly growing thanks to a packed-away damp tent.
So read on to learn the best practices for preparing your home sweet nylon home for pleasant camping trips. Soon you’ll be a master camper whose meticulous tent rituals set you up for the ultimate outdoor slumber party, with nature as your roommate.
Choose an Appropriate Campsite
Success with tent camping starts with picking the right campsite location. Here’s how to identify an ideal tent site:
- Seek a level spot free of bumps, divots, or slope which could lead to discomfort.
- Ensure the area is wide enough to accommodate the full dimensions of the tent without crowding trees or rocks.
- Check for overhead dangers like dead branches or widowmakers that could crash down in storms.
- Select a site with natural windbreaks for protection and shade options if possible.
- Avoid setting up in low spots or drainages that can gather water during rains.
- Pick a location at least 200 feet from water to minimize damage to shorelines.
- For privacy and noise reduction, choose a site well away from trails and other occupied campsites.
Taking extra time to find the optimal campsite sets you up for better rest by maximizing comfort, views, and protection.
Sweep Away All Debris
With a suitable flat, spacious site identified, thoroughly sweep away all loose rocks, sticks, pine cones, and other debris from the surface where you’ll pitch your tent. It may sound tedious, but this step prevents all kinds of sleeping annoyances:
- Removes rocks and roots that dig into your back through the tent floor.
- Eliminates prickly sticks, burrs, and cones that stab you when shifting around.
- Keeps dirt and debris from being tracked inside your tent.
- Allows your sleeping pad and tent floor to lie flat and smooth beneath you.
Use a large push broom or whisk broom to vigorously clear every last bit of detritus off the pad area for uninterrupted comfort.
Lay Down a Ground Tarp
For an extra barrier between your tent floor and the ground, unroll a large plastic tarp or painter’s drop cloth to create a footprint pad. Benefits include:
- Added moisture protection in case of rain or dampness.
- Smooths over small irregularities in the surface.
- Creates a clean surface free of dirt and debris contact.
- Allows you to pick up and contain debris after dismantling tent.
- Saves wear and tear on your tent floor over time.
Seek a tarp 1-2 feet wider on all sides than your tent to allow staking down edges.
Pitch Your Tent
Once you’ve prepped your dream campsite location, pitching your tent is next. Follow these tips:
- Unroll and unfold your tent, then spread it out fully over your cleared tarp area.
- Insert all poles, arch them into shape if flexible, and slide them into sleeves or clip them to corner joints.
- Attach all guylines to outer tent anchor points if provided.
- Stake down all floor corners first, then work your way around the tent perimeter.
- Pull the fabric taut as you stake to create taught, vertical walls and peak.
- Seal the doorway and any vestibules closed to allow the inner tent to take proper shape.
Taking a methodical approach ensures proper tent setup for ideal protection and rain resistance.
Allow Wet Tents to Dry
Tents are not meant for long-term wet storage. If your tent gets soaked during your trip, follow these steps to dry it out fully before stowing away:
- As soon as possible after rain, dismantle the tent and spread it out to air dry.
- If backpacking, hang it to dry overnight on tree branches, poles, or your trekking poles.
- Upon returning home, lay out all tent parts on the ground or carefully drape over a clothesline.
- Allow 2-3 days of drying time before packing up. Turn periodically to expose all sides.
- Check that no moisture remains in pockets or seams which could induce mildew.
Letting your tent thoroughly dry prevents mold, odors, and fabric degradation over time. Never store a wet tent!
Organize Your Campsite
Once your shelter is perfectly prepped, think about the overall campsite setup. Strategically position your tent in relation to other amenities:
- Keep your tent uphill and upwind of cooking, dishwashing, and bathroom areas.
- Maintain a good distance from food storage zones which could attract hungry critters at night.
- Set up at least 200 feet back from lakeshores, streams, and rivers as wilderness ethics recommend.
- Leave a wide berth around fires, stoves, lanterns, or anything with flame.
- Angle tent door towards views, sunrise, breeze, or focal point as desired.
With an organized camp, you’ll enjoy comfort, cleanliness, and convenience throughout your entire stay.
Perform a Trial Setup at Home
Especially if using newer gear, test out your entire tent setup at home first. This allows you to:
- Learn how all parts properly fit together through hands-on practice.
- Check for missing or defective components like broken poles or ripped fabric.
- Adjust stake, guyline, and seam seal points if needed.
- Apply protective sealant to floor and rainfly if recommended.
- Waterproof your new tent by applying a camping-safe DWR spray.
Mastering setup ahead of time prevents frustration when racing against darkness at your campsite.
Pack Properly for Transportation
To avoid damage en route to your campground, carefully pack your tent and accessories:
- Fold or roll the tent loosely to avoid creases. Many tents have specific packing methods.
- Place poles and stakes in protective sleeves or cases.
- Pack tent body and rainfly separately with other soft items as padding.
- Utilize the tent’s storage bag or place in a protective outer container if backpacking.
- Ensure tent will stay dry and secured during transit.
Proper packing for the drive or hike to your destination prevents bent poles, torn fabric, or lost pieces.
Now you’re ready to hit the road and get camping knowing your tent is prepped for maximum comfort! Setting up your portable getaway with care pays dividends when you crawl into your clean, dry shelter each night after memorable days exploring and playing outdoors.
Recommended Tent Care and Maintenance
Keep your camping tent in top shape for the long haul with proper care between adventures:
- Inspect: After trips, inspect for damage and perform needed repairs.
- Clean: Use a damp cloth to wipe away dirt. Clean membranes with specific cleaners.
- Ventilate: Air out tent fully before storage to prevent mildew.
- Store: Keep in a cool, dry place protected from sunlight in a breathable bag.
- Weatherproof: Apply waterproofing spray designed for tent fabrics before trips.
- Seam seal: Seal all floor and fly seams with urethane sealant every season or as needed.
- Lubricate: Keep zippers running smoothly by rubbing wax or lubricant along teeth yearly.
- Refresh: Over time, restore water resistance by applying tent floor sealant.
With regular TLC, a quality tent will deliver years of reliable service and great memories!
Handy Tent Accessories to Enhance Comfort
Consider these useful add-on items to amplify enjoyment during your camping trips:
- Footprint – Protects floor from abrasion and adds waterproof barrier.
- Gear loft – Rope net storage shelf frees up floor space.
- LED light strips – Self-adhesive lights provide interior illumination.
- Tent fan – Circulates air and reduces condensation for better sleep.
- Camping mat – Cushions from rocks and cold ground for better sleep.
- Self-inflating pillow – Provides neck support for optimal alignment.
- Door welcome mat – Scrapes shoes before entering tent to leave dirt outside.
- Travel blanket – Extra layer for colder weather camping comfort.
The right accessories can make your home away from home even more welcoming after active days of exploring nature’s beauty!
With thorough prep and care, your trusty tent will provide years of reliable shelter from the elements so you can enjoy the great outdoors in cozy comfort.
Frequently Asked Questions about Preparing Your Tent
Get additional answers to common tent camping questions with this helpful FAQ.
Q: How do I choose the best tent site?
Look for flat, level ground free of rocks/roots/debris. Seek natural windbreaks and shade as desired. Avoid low-lying areas that can flood. Pick a site 200+ feet from water sources to limit impact.
Q: Should I use a tarp under my tent?
A tarp under your tent helps smooth an uneven surface while blocking ground moisture and debris. Allow a tarp to extend 12+ inches wider than the tent on all sides.
Q: How often should I re-waterproof my tent?
Most tents benefit from reapplication of a waterproofing spray once or twice per year, especially before rainy/snowy seasons. Look for sprays made specifically for tent fabrics.
Q: How do I clean my tent?
Use a soft sponge, warm water, and a very mild soap to spot clean tent walls as needed. Avoid harsh chemicals. Rinse thoroughly. Always let your tent dry fully before packing away.
Q: How can I repair small rips or holes?
Seal minor tent tears with adhesive repair tape made for tents. For larger holes, carefully patch from inside using tent-grade urethane sealant and small fabric swatches.
Q: What’s the best way to dry a wet tent?
Set up tent as soon as possible after rain and allow air drying. At home, drape over a clothesline and let dry 2-3 days before stowing. Never pack a damp tent!
Q: How do I get rid of tent odor?
Eliminate tent odors by washing with an odor-eliminating sports wash, then allowing full drying. Check that no food or residue is trapped in corners. Air out before storing.
With the right preparation and care, your tent will provide a homey, comfortable shelter for all your camping adventures for years to come!