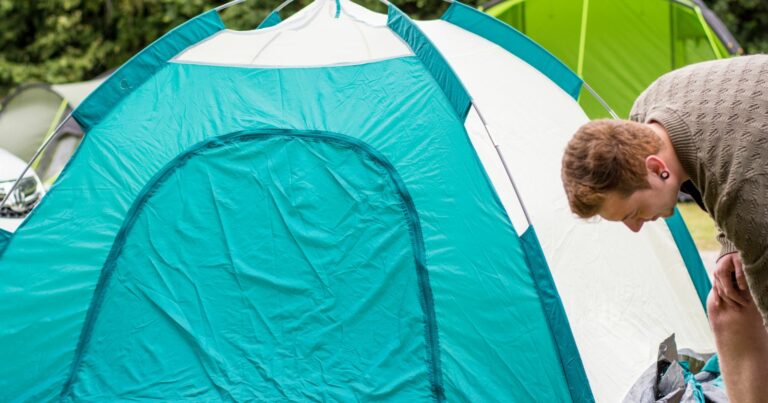
Craft Your Own Outdoor Oasis: A Guide to Camping Tarp Setups
Spending time in nature is rejuvenating for the soul. Waking up to birds chirping in the fresh morning air can make you feel truly alive. But let’s be real – sleeping directly on the hard ground isn’t always the most comfortable. The solution? A simple yet versatile camping tarp.
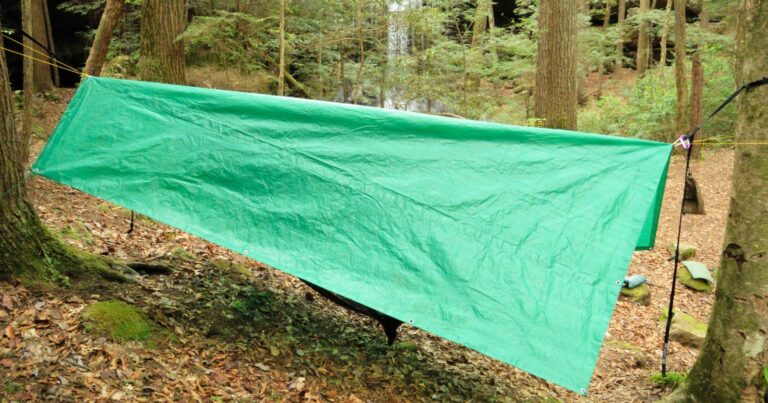
Setting up a tarp overhead can give you better rest by protecting you from bothersome elements like rain, wind, or the blazing sun in your eyes at daybreak. With just a durable sheet of material staked or tied off above you, it’s like you have a roof over your head!
Putting up a tarp is also super easy to DIY compared to a full tent. You can shape it into different shelter configurations with a little creativity. The key is picking a flat spot protected from the wind, securely staking down your tarp taut, and using accessories like poles or guylines to customize it.
In no time, you’ll have an overhead haven ready for sleeping under the stars, protected and cozy. Follow these basic steps, and you can unwind in your private tarp shelter, made just the way you want it. The night awaits!
Step 1: Pick the Perfect Campsite
Choosing the right campsite location is key for a great tarp setup. Here’s what to look for:
- Flat terrain – Avoid sloped or uneven ground that can cause part of the tarp to sag.
- Clear of debris – Remove sticks, rocks, pinecones from the area covered by the tarp so you have flat floor space.
- Protected from wind – Face the open side of the tarp away from the wind direction to prevent flapping and reduce airflow under it.
- Open sky access – Choose a spot with a view of the sky to enjoy stargazing at night from your shelter.
- Natural shade – Utilize nearby trees or structures to help shade part of the tarp during hot, sunny weather.
- Privacy – Pick a semi-secluded campsite away from high traffic areas for more solitude.
Step 2: Lay Out Your Tarp
Once you’ve identified the prime real estate for your tarp, it’s time to lay it out:
- Unfold the tarp and ensure it is opened up to full size. Tarps come in sizes from 5×7 ft. up to 20×20 ft. or more.
- Spread out the tarp over your cleared campsite area. Make sure it is centered and positioned exactly how you want it.
- Point the openings of the tarp toward or away from wind direction, the sun, rain, etc. based on conditions and your shelter needs.
- Lay it flat with no bumps or wrinkles. Weight down the edges with rocks if it’s windy as you get set up.
- Plan entrance and exit points by situating the tarp’s openings where you want to get in and out from.
Step 3: Anchor Your Tarp
With your tarp laid out, it’s time to secure it in place. Here are some tips:
- Use the provided stakes – Most tarps include stakes that can be pounded into the ground using a mallet.
- Tie off to trees – Rope or cord can be tied to trees at the edge of the tarp to hold it in position.
- Utilize boulders or logs – Large rocks or downed limbs can anchor the tarp edges when staked to the ground underneath them.
- Sandbags – Filled bags placed on tarp edges can hold them down in windy areas with sandy soil.
- Adjust tie downs – Start by placing anchors close together, then widen as needed for desired tautness.
Step 4: Tighten up the Tarp
Once anchored down, you need to tighten your tarp so it’s taut overhead:
- Cinch the corners – Pull corners and edges as tight as possible before fully securing tie downs.
- Check for sagging – Look for any center or side drooping areas and tighten those edges more.
- Even the tension – Adjust guy lines so tension is even across all sides.
- Re-pound stakes if they get loose as you tighten. They may need to be driven deeper.
- Test the tautness by gently pushing up on the tarp. It shouldn’t flap or sway if tightened properly.
Step 5: Add Accessories and Finishing Touches
Personalize your tarp shelter with optional add-ons:
- Poles or ridgelines – Add stability and headroom by putting a pole in the center or rope between two trees.
- Screen walls – Attach mesh or privacy fabric walls for more of an enclosed feeling and insect protection.
- Floor tarps or mats – Layer tarps or foam under your shelter for softer walking and sleeping.
- Door flaps – Use fabric panels, zippers, or Velcro for closable doorways and windows.
- Loops and pockets – Attach storage pouches and gear loops to the underside.
- Lighting – String up outdoor lighting or lanterns under your tarp for nighttime visibility.
- Seam sealing – Coat stitched seams with waterproof sealant to prevent potential dripping in heavy rain.
Tarp Configuration Styles
With a staked down tarp overhead, you can create different structure styles:
A-Frame – Tie down all four corners and fold one side over and secure to create a triangular enclosed shelter. Provides good wind protection.
Lean-To – Stake down one side while leaving the other open. Ideal if camped against a rock wall or tree line to reflect heat.
Box Knot – Tie two corners to trees and two to ground to make a square shelter with closed corners.
Pyramid – Stake down all four sides in an elevated pyramid for maximal headroom at center.
Half Pyramid – Stake three sides to ground and lift one side and secure to a pole or tree branches.
Wind Shed – Anchor only the windward side while leaving the rest open. Minimizes flapping in strong wind.
Evaporative Cooler – Drape the tarp with sides open to allow airflow. Wetting the tarp can also cool the interior via evaporation.
Pick the Perfect Tarp and Get Camping!
With the right tarp location, professional grade securing, and creative configurations, you can craft an amazing personalized camp shelter.
It provides cover from the elements, added comfort for sleeping, and an awesome way to make your campsite feel like home. Don’t settle for fully exposed camping with no refuge.
With a properly set up tarp overhead, you can relax and rejuvenate surrounded by natural beauty. Sweet dreams under the stars!