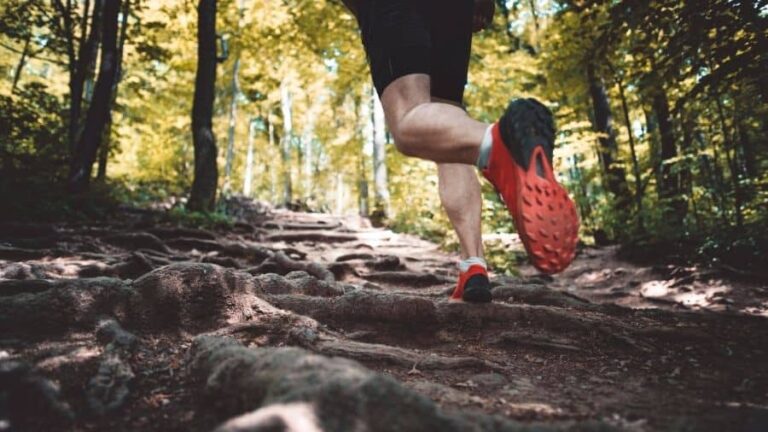
How to Program a Trail Camera?
When it comes to security/surveillance and hunting, trail cameras have proven to be reliable devices for discretely taking pictures or recording videos of targets once their motion or even body heat is detected. However, the efficiency and effectiveness of a trail camera depend on how well it has been programmed. So the question is: how are trail cameras programmed?
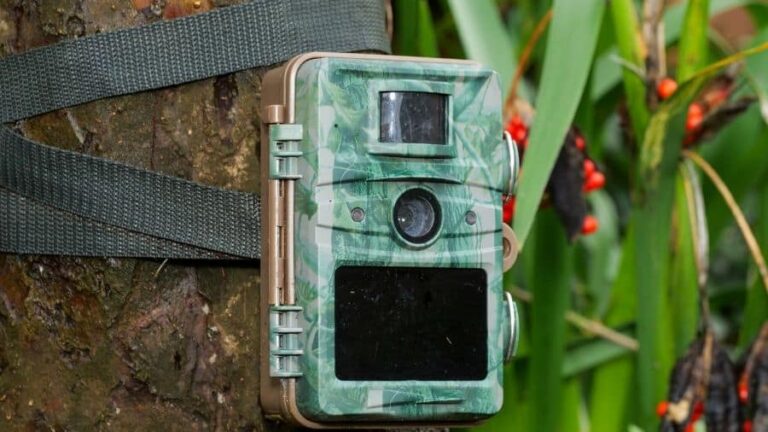
Trail cameras are programmed by configuring the settings and positioning them for optimum performance according to the user’s preference. Information about how to do this will be contained in the user manual.
The reason why most trail cameras malfunction after purchase is because most users have less or no knowledge of how to perfectly set up and program them. It is also important to know that positioning is of vital importance in setting up your trail camera. In the rest of this article, we will provide interesting and useful information about how to program trail cameras; let’s roll!
Programming and setting up a trail camera
Immediately after purchasing your trail camera, the next thing you should do is to set it up. You should get more than one trail camera if you are surveying a very large environment or you want to get games from different locations so that they would be mounted on the various locations to give you perfect surveillance.
In most cases, your camera comes with a manual that explains these processes. The following steps are necessary to be taken during programming and installation of trail cameras for the best performance:
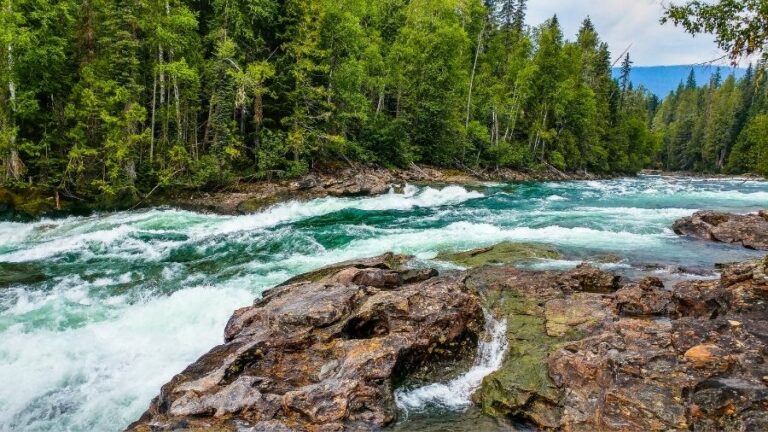
Decide on a location with the highest potential
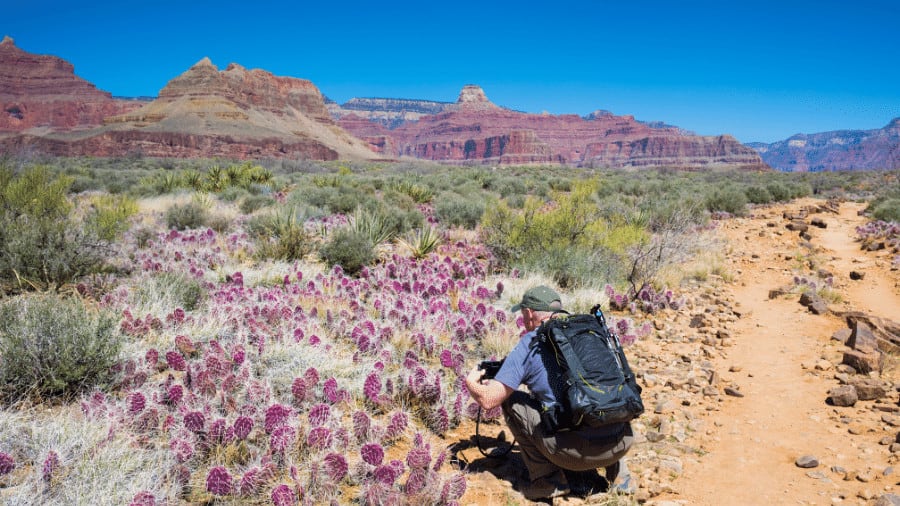
First and foremost, the best place to fix a trail camera is where there are lots of activities going on either where the targeted game visit frequently to feed, or where a lot of people move through (if used for security purpose).
It is important to know that during the winter season, the best location to install your trail camera is on either mock or natural scrapes. In the early winter season, the best place to fix your trail camera is the outskirts of fields. During the mid-winter season, food plots are considered to be the best. With regards to the summer season, mineral sites and feeder stations are your best bets. You can also decide on any location that you feel is best for you.
After you have found a good location, the next thing to do is:
Prepare the Camera for its first launch
Configuring the settings on the trail camera before installing it is very important for optimum operation. The first task in doing this is to choose the right battery.
Trail cameras are digital products and this means that for them to function, electrical power is required. So it is very crucial to know that your choice of batteries has a large impact on how long your camera will last before it goes flat.
Cheaper batteries do not usually last long and will most likely make the camera not to last long before it goes flat. Costlier batteries on the other hand usually have longer lifespans. Below, are recommended kinds of batteries that could be used in trail cameras:
- Rechargeable Batteries
Most trail cameras come with a rechargeable NiMH battery pack. Rechargeable can be recharged by plugging the camera into an electric socket and they have proven to be the cheapest method of powering both trail cameras and other digital devices.
- Alkaline Batteries
These particular kinds are the commonest AA batteries that you can find, and they are not really expensive but they do not also last long though they last longer than the normal rechargeable batteries.
- Lithium Batteries
Lithium batteries last longer than the other types. It is recommended to use them because a set of these will typically last the entire hunting season, except your trail camera has an above-average battery drain. It is important to know that this kind of battery is quite expensive but has commendable durability and performance.
- External Power Packs
The majority of the modern trail cameras available in stores today have plugs compatible with external battery packs. These are power units typically only a little smaller than the camera itself, but which can power that trail camera for a long time.
- Solar Cells
The solar cells system is the most expensive option because it provides your trail camera with green energy that does not necessarily need replacement or recharging. The power is derived from sunlight energy and as stated earlier, cameras that are solar-capable can be very expensive though their power rating and performance will worth their prices. Trail camera users that don’t have budget constraints are better off with them.
Update your Camera’s Firmware
Trail cameras are just like small computers and like any electronic device, they run on bits of software called firmware.
Updating your trail camera firmware is a simple process that can stop a lot of problems. It is advisable that you carefully do this before mounting your cameras on the field or wherever else you wish to keep your eyes on.
To update your camera’s firmware, visit the manufacturers’ website to check for any firmware updates. It is important to note that doing this will not bring any harm to your camera as some users often think. It is however strongly recommended that you follow the update instructions carefully as any errors could result in your camera being bricked.
Get your SD cards and number each Camera and the SD Card allocated to it
Getting an SD card or cards (for multiple cameras) is very vital. Without an SD card, photos were taken or videos recorded by the camera will not be properly stored.
To do this correctly, take a permanent marker and write a number on the bottom or back of the camera body, as well as on the SD card. It will then be much easier to organize your photos and videos when you get your SD cards back home for analysis.
It is very important to make sure that whatever type of SD card you have is installed properly. Improper installation will definitely pose a problem and you will not be able to view footage immediately. You can get information about installation from the user manual/instructions of the SD card.
Customize/Configure your settings
In your trail camera user manual or buyers guide, you will find information on to customize or configure the different settings that will enable you to achieve your aim of purchasing the camera. The common settings include flash settings, trigger frequency, timer, and trigger speed (to ensure adequate timing and recording), Wi-Fi settings, and other features that the camera sports.
Record the GPS Coordinates of each Camera location
A smartphone or handheld GPS unit can be used to mark the exact coordinates of each camera. Doing this is very necessary because it assures you of the safety of your camera.
After marking the GPS coordinates, you can choose not to check your camera for weeks. If it gets missing or gets covered by trees and leaves, you can always track it. This will save you from losing an expensive camera worth maybe up to $200 camera or more in the woods because you can no longer see it.
Use Google Earth to pinpoint prime locations
It is very important to always use Google Earth to pinpoint prime locations because Google Earth is a powerful tool for scouting your properties for prime buck territory.
Google Earth overlays the satellite imagery over the top of elevation and contours, giving you a classic view of your property. It is also important to note that you can input the GPS coordinates of all your trail cameras on Google Earth to see where you might be missing some coverage.
The above listed, are steps on how to successfully program your trail camera. Below are the tips and tricks that will guild you to successfully set up your trail camera:
Test Run Your Trail Camera
Before you can confidently assume that you have programmed your trail camera well and you are good to go, make sure that the given footage meets your requirements and objectives.
An important aspect of doing this is to try it out under different lighting conditions which should be both during the day and at nightfall.
You can take notes of how each of the settings was programmed and review the result on your SD card to see if they meet your requirements. If the footage is not what you need, again take note of those settings, and reflect it on your camera.
Before installing your trail camera in any location, it is also necessary to make sure it is functioning at home. You can test run it by mounting it on a tree or a fence at home so you won’t have to fumble with it later. Turn on the camera and move in front of it to trigger it and take note of the results for any adjustment if need be.
Place your Camera on the Trail Angle
You need to place your camera along the most likely path of your targets. For security, trail areas can be car parks, open hallways, entrance porches, or where valuables are kept.
For animal/game watching or hunting, you need to study your hunting location before stepping out to hunt because it is very vital to place your camera on the trail. By properly placing your camera to the trail, you are giving the motion sensors a much larger window to trigger and capture an image. Instead of getting just the tail end of the animal, you stand a much better chance of getting a great full-body picture of deer for instance.
Get rid of obstructions to Flash and Lens
One thing that prevents your camera from taking clear pictures or recording sharp videos is the presence of trees and grasses. These elements can also cause your camera to have several false triggers due to movements caused by the wind. Having too much grass and branches in front of your camera sensors can leave you with hundreds of blank photos. To avoid this, always make sure your motion sensors have a clear field of view.
Another issue that could be caused by not getting rid of obstructions is when there is an object like a leaf or branch directly in front of the LED flash, instead of portraying the animal clearly, the obstruction will be lit up leaving you with an underexposed image.
You can fine-tune the camera alignment and ensure good quality output by using a camera viewer or by investing in an SD card reader.
Combine Time Lapse and Trail Modes in your Camera
When you are able to properly combine these two features, you will be able to discover the movements of both humans and animals over a very large area.
The best strategy is to set the device to cover frequently accessed areas for humans and known travel areas and food plots for animals.
Setting up your time-lapse will make your camera to take pictures every 10-20 seconds over the first and last few hours of daylight, depending on how you set it. You might not capture every animal there, but this will make your batteries last for weeks rather than days as constant shutter clicks reduce your battery level very fast and some batteries may not even last up to a week under this condition.
Place your Camera away from direct sunlight
Trail cameras should always be positioned away from direct sunlight. Everyone who practices photography knows that the light source should be behind the camera. If it’s in front, it’ll wash out the picture and hide the subject in shadows thereby producing blurry pictures in most cases.
Though the sun travels from east to west, it is always on the southern side of objects, at least in the northern hemisphere. This means that for clearer pictures, your camera should face north.
If you notice that most of your targets are more active in the morning, turn the camera to face northwest. If on the other hand, they are more active at dusk, the best direction to turn it will be northeast. If the direction with much sunlight is the direction where you have most animals coming in from, try to position your camera in such a way that the rays of the sunlight will not affect the quality of your photos.
Get rid of any scents
The essence of getting rid of any form of scent is to prevent especially animals (usually the ones that can easily detect the smell from a very wide range like deer) from detecting your camera or scampering away. A scent-free trail camera can be achieved by following these common-sense tips:
- If you wish, spray the camera with your favorite scent eliminator, and wipe off with a clean towel. Try not to let any moisture come in contact with the lens or you will end up with blurry pictures.
- When touching and setting up the camera, try to use scent-free neoprene gloves to reduce the human odors on the housing and mounts.
- When you go back out to check your cameras, make use of the same neoprene gloves as well and wipe them down again with the scent eliminator spray.
Note: A rubber boot can help reduce any form of human scent so it is always advisable to wear one when checking up on your cameras.
Check your camera on rainy days
During raining season, the possibility of animals detecting human scent is very rare because rain naturally eliminates human scents by knocking particulate in the air down to the ground, this efficiently gets rid of much of your scent trail.
It is important to know that paying closer attention to the wind direction when you visit your cameras in the rain will be helpful, and you still need to practice the scent control methods highlighted above.
Develop a Photo Organization System
It is necessary to develop a photo organization system because if you keep checking your cameras every 3 or 4 weeks, you will have a lot of pictures to evaluate.
The more cameras you use around your property or for animal/game watching or hunting, the more important it is to develop a way of organizing them. Good organization leads to better patterning and will enable you to study the peculiar habits and tendencies of your target.
Below are some tips on how to organize your photos:
- It is necessary to use 2 SD cards for each camera, with matching numbers written on the cameras and cards. The essence of this is to help you can swap SD cards in and out easily and download them to your computer at home. Another way is to use a cheap laptop to download each SD card so that photos there can be stored in the laptop then place the SD cards back to the camera.
- Use a folder system to create a directory on your computer. It can go in this format: Property > Camera Number > Date.
- Store only the images of humans or animals that you want to keep track of overtime.
- If possible, keep time-lapses only if there is evidence of one of your targets in it.
Note: In case you find any of the above too complicated or time–consuming, there are now trail camera software options as well as smartphone hunting apps that make managing your photos more efficient and help you to analyze and pattern your targeted animal. Simply search for them using your preferred search engine.
Upgrade to a Black Flash
Black also means no-glow flash. Flashes on trail cameras use a pulse of white light that could startle and blind deer. Standard infrared cameras use a burst of red light to see the target at night.
A black flash camera uses a low glow or no glow infrared flash. This means that upgrading to a black flash could help prevent notifying humans, deer, or other animals of the presence of anybody or of danger.
All trail cameras make some amount of noise when taking a picture, so it’s not completely undetectable by deer, but black flash does help in preventing your camera from being detected by unwanted human visitors. This could also reduce the risk of your camera getting stolen or being destroyed.
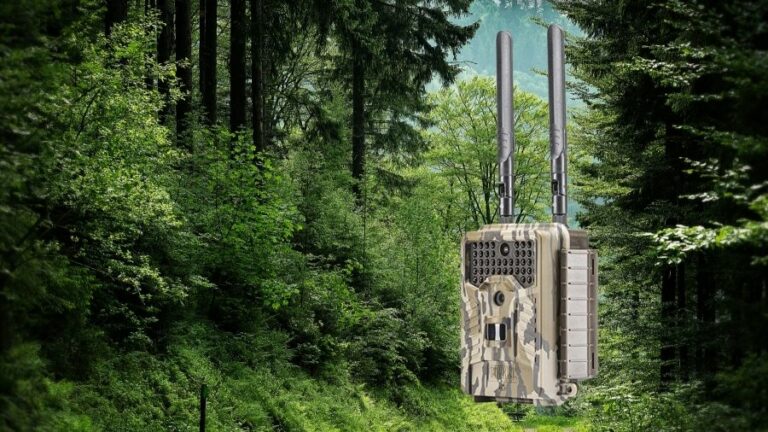
– If possible, upgrade to a Cellular/Wireless Camera
A cellular trail camera uses its cellular capacity to connect with your other devices. So, if your chosen area of surveillance is a long distance from your home, you might want to consider investing in some of the top cellular trail cameras for keeping tabs on humans and animals from afar.
Using a cellular camera will save you the stress of visiting your cameras every few days and deliberating if they captured any good footage. Once you connect your camera to your phone, computer, laptop, or other devices, the photos or videos automatically transfer from your camera to them, so from your home you can see your camera’s output instead of going to check them occasionally.
You can also set these cameras up on your wireless devices’ plan to send pictures directly to them.
The benefits of wireless cameras are numerous though the major drawback is that they can be quite pricey, think about all the time and gas you will save and the investment will pay for itself.
Protect your Camera from Theft
Your camera is your private property and as such, it should be protected and kept away from the sight of thieves. No matter what you do to secure your trail cameras, be it by investing in python cables or locking them in steel housings, there is always the possibility of a dirt bag swiping your camera. Trees, where they have been mounted, can be cut down, cables can get snapped and other housing materials can get destroyed.
Below are some of the simple steps that you can take to increase the odds that your trail camera survives the season:
- Always avoid mounting your camera in obvious locations such as directly off a timber road or in front of a feeder.
- Place your cameras a few feet higher than eye level. Not only will most people not be looking up, if they can’t easily reach it, but they will also most likely just move on.
- Try disguising your cameras with leaves and brushes. Luckily, some modern brands come in camouflage or woody colors and other colors that can easily blend into the background.
- Most new versions of cameras sometimes have a security code feature. This may not prevent the theft of the camera, but it will prevent the person that stole it from gaining access to the stored information.
Tips for Management & Maintenance of your Trail Camera
Enjoying your trail camera will not be possible if you do not manage and maintain it well. Listed below, are few tips to help you take care of your trail camera and ensure it lasts for some good number of years down the road:
Invest in a durable trail camera
There are a lot of things that can damage your trail camera so if you want to enjoy your camera, always invest in quality ones. You would definitely want your trail camera to be able to tolerate any weather conditions so it is best to invest in a nice one. Usually, the higher price of the camera, the higher the quality, and of course, the longer it will tend to last. The same goes for the kind of batteries that you invest in.
Mounting Location
The position and location where you mount your camera are very vital. If you mount your trail camera at the right location or spot, it will take away the stress of having animals damaging or mess with it or of humans stealing or destroying it. It is very vital to know that it is not a bad idea to cover the camera with some sort of camouflage either with a brush or leaves to ensure perfect secrecy.
Always Invest in Quality Mounting Technology
Bungee cords might be the right mounting system for one user to keep other users or targets from stealing or damaging their trail camera. While a bracket or a different form of better mounting technology might be right for another.
Constant Maintenance
Constant maintenance of your trail camera will lead to greater success in its application. This is because most companies that make trail cameras tend to create regular firmware updates. These updates make the risk of memory and photography issues lesser. To update firmware, check the manufacture’s website.
Having made up your mind to use a trail camera, programming, and setting it up is very crucial for ensuring optimum performance. It is also crucial to do these correctly to avoid disappointments as trail cameras are already programmed machines and if reprogrammed wrongly they will not perform well. We hope this article has helped you learn what to do and we hope you enjoy that camera!